Archive | Homesteading

Early Morning Fires and Homeschool Projects

Kye, Caiden and Sandy sitting (at a safe distance) by a warm fire…

Olive found the sun… (photo by Erin)

This weekend Caiden planted his Bottlebrush tree. This is part of his Leaping Wolf badge that he is working through and will complete before he goes up to Scouts from Cubs in 2 weeks time. This particular badge is called Greening the Community. He chose the tree, planned the whole project, chose the tools to use, compost etc… he also has to document his projects in a journal with photos.

He is very proud of this tree that he planted, it was so heartwarming to see him walking out into the garden today to ‘check’ on his tree and see how it was doing.

Another part of this badge is to show how plants breathe or transpire. Remember these little cloches? They are also perfect for showing that plants do indeed breathe, can you see all the water droplets on the bottle?

My lettuce has been growing beautifully with these little cloches around them. The bugs seem to have been kept at bay and the lettuce has been given a chance to grow.

Caiden is learning about the Vikings for is grade 5 school work so he made a viking ship by covering a wine bottle with paper mache, painting it and adding a wooden base for the top of the boat.

Erin is learning about anti-cyclones in her grade 7 geography. She made a globe by covering a balloon with paper mache, painting it blue and adding the continents. She made her anti-cyclone circles with pipe cleaners and pinned them on.

Have you been busy with any projects lately?


Knitting Flowers e-Book Update:

I have had a few emails from readers who would like to purchase my E-book as a PDF for their computer.

The E-Book in PDF format can now be bought from:

ETSY, Ravelry and Craftsy

PS If you haven’t entered the giveaway from GermanDolls yet go here to enter.

Have a lovely week

Linda

9

Peas and Beans…

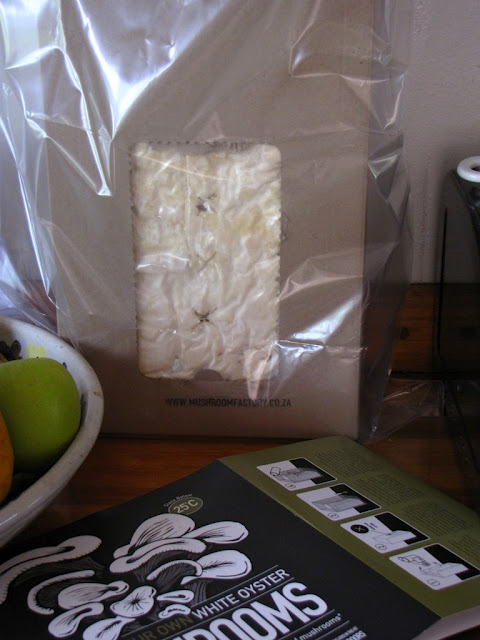
Jenna has been making her first quilt over the last few months and today she finished the front of it, I love it, it’s so beautiful! (Proud mama here!) The heat continues to be incredible, but we just turn on the borehole sprinklers and head straight for the pool… I have also decided to start our mushroom growing kit, it has all been set up and apparently we will have mushrooms growing within 15 days! So exciting, I need to spray it a few times a day with cooled boiled water and that is all:)
Tonight we are making stew for dinner and I am adding broad beans from our garden, we picked most of the beans and quite a lot of peas too, it’s hard not to eat the peas though, they are so sweet! Tomorrow I will pick the rest of the bean and pea crop and freeze them. Thank you all so much for your comments about the jam. We ate some this morning and I must say I am VERY pleased with how it turned out, I wasn’t too sure about its consistency when I was pouring it into the jars, but this morning, I can spoon it onto my toast and it is lovely and thick, (but not too thick). I am also glad about putting it through the juicer because of the pulp it created, so no big pieces of fruit in the jam, the pulp has added an even texture. I am going to freeze the extra bottles and give some away as gifts. We are going to make more jam tomorrow too, I have discovered that another one of our mulberry trees has large and juicy fruit on its branches, I love all the preserving that is going on over here.

9

Making Mulberry Jam

We have had such an exceptionally hot day here in Johannesburg today, 35 deg C, as soon as we walk out the door we can feel the heat bearing down on us, not too pleasant at all. Is anyone in Australia or New Zealand experiencing similar weather? We have had to water our veggies like crazy to save them from being burnt by the sun… Anyway, today I decided I wanted to try and make jam. We have a mulberry tree that grows in a rather shady area of our garden and this tree gives us the most wonderful fruit year after year, really sweet, juicy mulberries, so mulberry picking we went. We have another five mulberry trees in our garden, but this is the one! So after lunch, we all went outside and started to pick as many of the little fruits as we could find. A whole bowl was picked and then the fun started. I have some left over mulberries from today’s harvest so I will attempt a different recipe tomorrow.
I found this recipe, I only used berries and sugar and now we have six jars of lovely sweet mulberry jam cooling in the kitchen.

I washed the berries first.

Then I thought I would put them through the juicer and extract the juice. I kept the pulp.

I started boiling the glass jars for the jam and made sure they were ready to use at the same time that the jam was ready to be bottled in the jars.

I added the sugar and I also added some of the pulp that was put through the juicer that I kept aside earlier.

Once the jam had boiled and thickened, I removed it from the heat, spooned it into the boiling hot bottles, left a space at the top of the jam jar and put on the lid.

And there you go, lovely jam, please refer to the original recipe in the link above for exact measurements and method:) I think a few of these bottles will be nice to give away as gifts.

What have you been doing today?

Have a lovely day.
Linda

Jam Update:
We ate some of the jam on toast this morning and I must say, it is just wonderful!! I am so glad I put the mulberries through the juicer, it gave us beautiful smooth pulp to add to the liquid on the stove and the consistency of the jam is divine, no big pieces of fruit, just lovely:)

13

Worm Farms

Today the girls wormeries arrived, they were so excited and we set them up straight away! First we unpacked everything inside the boxes and started to add the layers as per instructions. We put in the worms and a small amount of food for them. The worms are going to live in the kitchen in the space where the dishwasher used to be. We no longer have a dishwasher and I actually find the process of washing up by hand more enjoyable than using the machine, this might not make sense, but instead of rinsing all the dishes first and then packing the machine, using expensive dishwasher soaps and plenty of water, we now just wash by hand in the sink and it feels good, it makes me feel more connected to my tasks as a homemaker… Ok, I am going way off topic here… Anyway, back to the wormeries, we have got 4 now and this should give us amazing worm tea and compost for the garden. They are Wizzard Worms Wormeries and are so compact and tidy and look quite sweet in the corner of our kitchen. It’s nice to think that there are sweet little worms working away quietly at our kitchen scraps converting them into worm tea and compost, pure liquid gold…

The worms arrived packed in this cardboard box with plenty of moist compost and paper.

Kitchen scraps went on top with a few pieces of shredded cardboard…

Once we were finished we covered both sides of the worm bin with soaked newspaper and let the precious creatures get on with their magic composting…

Wormery update:
Just to answer some questions, the wormeries should be just fine situated in your kitchen, they do not have an odour if they have the perfect balance of air, moisture and food. If you are going to keep your worm farm outside, it needs to be kept in the shade. Sometimes if the worms are overfed, then quite a putrid smell can emanate from the bin because of the rotting veg. I cut up my veggie scraps quite small to help the little worms with their composting. Most veggie scraps can go into the bin except citrus, pineapple, onions and I also don’t add potato skins or potatoes. (added 27 May 2011)
Here are some links to DIY wormeries.
Related Posts Plugin for WordPress, Blogger...
12

Powered by WordPress. Designed by Woo Themes


Hit Counter provided by Los Angeles SEO Company